What this guide covers
- Quick plan
- Measure and check before you buy anything
- Constraints table
- The decision process, in order
- The shelf-spacing planning specification, in plain English
- Worked numerical example
- Diagram: item-height groups and shelf positions
- Adjustable shelf worksheet
- What not to buy or change yet
- A repeatable reset routine
- FAQ
- Method notes
- Sources
Pantry shelf spacing comes down to one plain-English calculation, repeated once per shelf: the tallest item in a group, plus the shelf’s own thickness, plus however much handling room you want to reach in and grab something without tilting the item behind it. This is a planning specification you apply to your own measured items, not a universal fit guarantee — your shelving system’s own adjustment range and load limits still set the outer boundary.
Quick plan
- Group pantry items by height before deciding on any shelf position.
- Measure the tallest item in each group, not the average or the shortest.
- Choose a handling clearance and apply it consistently across shelves.
- Confirm your shelving system’s adjustment holes or clips actually land near your target height.
- Recheck spacing whenever a new item type genuinely changes a group’s tallest height.
Measure and check before you buy anything
Constraints table
| Element | What to record | Access needed | Shelf/system condition | Added cost | Use frequency |
|---|---|---|---|---|---|
| Available pantry/cabinet height | Floor to the highest usable point, in inches and centimeters | N/A — this is a fixed measurement | Confirm no obstruction (light fixture, vent) reduces usable height | $0 | Measured once, reused for every zone |
| Shelf thickness / profile | Measure the part of the shelf or rail that reduces clear vertical space | N/A | Solid and wire systems vary, so measure the actual shelf profile rather than assuming a value | $0 | Measured once per shelf type |
| Handling clearance | Your chosen extra room for reaching and lifting an item out | Depends on how you reach into the zone | N/A | $0 | Applied to every shelf |
| Adjustment increments | The fixed spacing between your system’s pins, clips, or track holes | N/A | Check your specific shelving system’s manual or markings | $0 | Checked once per system |
The decision process, in order
- Sort pantry items into height groups before touching a shelf. A rough three-group split — short, medium, tall — is usually enough; finer groupings rarely add value unless your pantry has an unusual number of very tall items.
- Measure the tallest item in each group, not a typical or average one. The calculation below is only as accurate as this single number, so measure the actual tallest box, jar, or bottle in the group with a tape measure rather than estimating.
- Choose one handling clearance and apply it consistently. Decide how much extra room you want to lift an item out without tilting the next one, and use that same number across every zone unless a specific zone genuinely needs more.
- Run the calculation for each zone, from the bottom up. Add the tallest item’s height, the shelf thickness above it, and your handling clearance to get each shelf’s target position.
- Check your target position against your shelving system’s real adjustment points. Round to the nearest available pin, clip, or track hole rather than assuming the exact calculated number is achievable.
- Only then, consider an insert or riser. If a specific zone still wastes noticeable space after repositioning the shelf itself, measure that zone’s exact leftover gap before choosing an insert sized to it.
The shelf-spacing planning specification, in plain English
For each shelf zone, starting from the floor or the shelf below it, the space to the next shelf equals three numbers added together: the height of the tallest item that will live in that zone, plus the effective thickness or profile of the shelf sitting above it when that profile reduces clear space, plus your chosen handling clearance — the extra room you want so you can lift an item straight up and out without tilting the one next to it. This is a starting specification, not a promise that every item will fit with room to spare; taller replacement products, seasonal packaging changes, or a system with only a few fixed adjustment points can all mean your final shelf lands slightly higher or lower than the exact calculated number.
Worked numerical example
Say a lower pantry zone is meant to hold cereal boxes, with the tallest box in that group measuring 12 in / 30 cm. The shelf sitting above this zone is a solid shelf, 0.75 in / 1.9 cm thick. You decide on a handling clearance of 1.5 in / 3.8 cm, enough to tilt a box slightly forward without hitting the shelf above. The next shelf position, measured from the shelf below, is 12 + 0.75 + 1.5 = 14.25 in, which converts to 36.2 cm (use the precise inch total to convert, rather than adding the already-rounded centimeter figures, since summing rounded components can drift slightly from the true value). If your adjustable shelving only has holes every inch, you would round up to the next available 15-inch mark rather than leaving the shelf at an unsupported height.
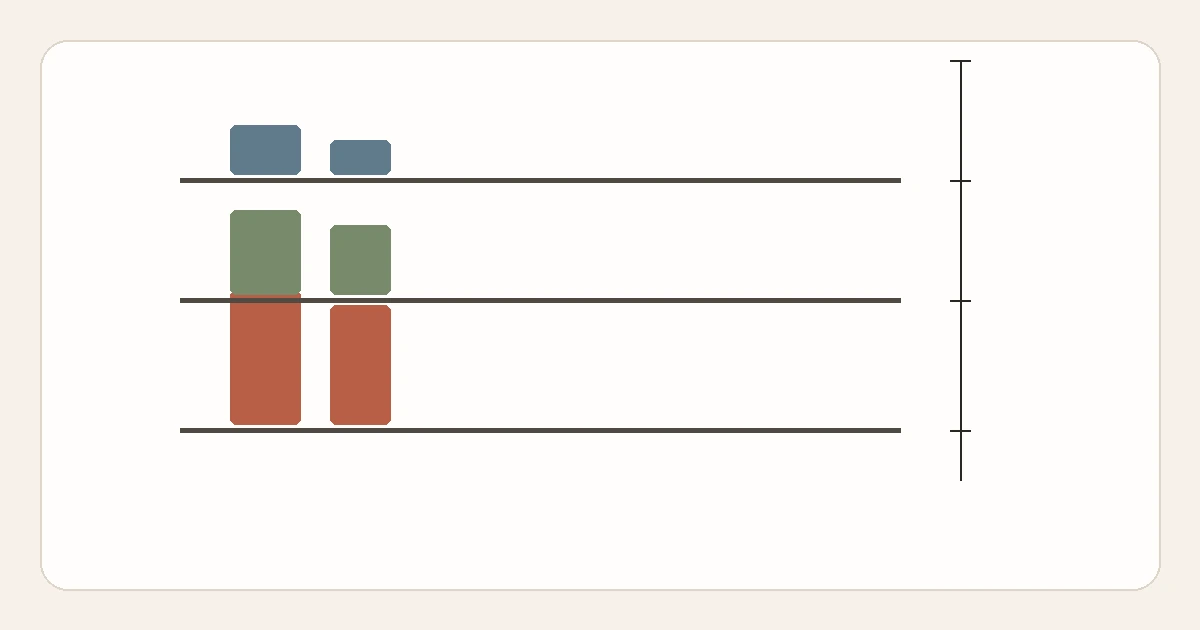
Diagram: item-height groups and shelf positions
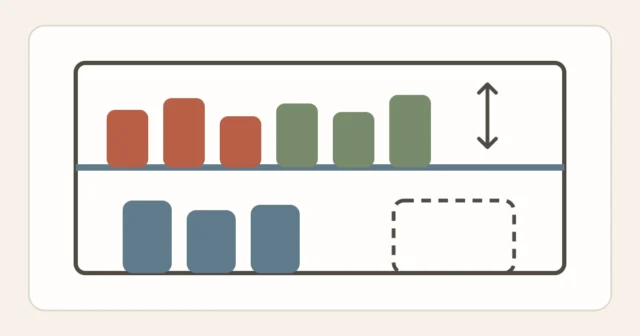
Each shelf sits just above its own group’s tallest item plus the chosen handling clearance — not at a fixed universal height. Grouping by height first, before placing anything, is what keeps taller zones from stealing space that a shorter group never needed.
Adjustable shelf worksheet
This is a fill-in worksheet. Work zone by zone from the bottom up; the first row is a completed example, and every other row’s cells describe exactly what to measure and record.
| Zone (bottom to top) | Tallest item height | + Shelf thickness | + Handling clearance | = Target shelf position |
|---|---|---|---|---|
| Example: Zone 1, cereal boxes | 12 in / 30 cm | 0.75 in / 1.9 cm | 1.5 in / 3.8 cm | 14.25 in / 36.2 cm above the floor or lower shelf |
| Zone 2 | Measure the tallest item planned for this zone | Measure the shelf/profile that reduces clear space; use 0 only if it truly does not reduce the measured opening | Choose and note your handling clearance for this zone | Add the three values in this row |
| Zone 3 | Measure the tallest item planned for this zone | Measure the shelf/profile that reduces clear space; use 0 only if it truly does not reduce the measured opening | Choose and note your handling clearance for this zone | Add the three values in this row |
| Zone 4 (if applicable) | Measure the tallest item planned for this zone | Measure the shelf/profile that reduces clear space; use 0 only if it truly does not reduce the measured opening | Choose and note your handling clearance for this zone | Add the three values in this row |
What not to buy or change yet
- Do not buy stackable risers or shelf inserts before completing the worksheet — several zones often need only a shelf reposition, at no cost.
- Do not assume a fixed clearance number such as “always leave 2 inches” applies to every zone; base the clearance on how you actually reach into that specific shelf.
- Do not load a shelf beyond its system’s stated weight rating to fit more into a recalculated zone — spacing and load capacity are separate limits, and this guide only addresses spacing.
- Do not drill new permanent shelf-support holes into a rented pantry or cabinet before checking your lease; most adjustable systems use existing pins or clips that require no modification.
A repeatable reset routine
- Whenever a new product genuinely changes a group’s tallest height: re-run the calculation for that zone only, rather than reworking the whole pantry.
- Seasonally: confirm the height groups still match what you actually buy; grocery packaging changes more often than most people notice.
- Once a year: re-check that your handling clearance choice still feels comfortable, and adjust it if your reach or your typical item weight has changed.
FAQ
What handling clearance should I actually choose?
There is no universal number. Start with enough room to lift or tip the actual tallest item out in the way you normally handle it, then test that movement before finalizing the shelf position. The useful clearance is the one that works with your real item, reach, and shelf depth rather than a preset angle or percentage.
What if my shelving only adjusts in large increments?
Calculate your target position as described, then round up to the next available increment rather than down — rounding down risks the tallest item in that zone not fitting at all.
Does this method work for wire shelving as well as solid shelving?
Yes. Use the same method, but measure the effective profile of the actual wire shelf, rail, lip, or support where it reduces the clear opening. Enter zero only when your own measurement shows that the shelf profile does not reduce the usable vertical space for that zone.
Should I build this as a spreadsheet or app instead of doing it by hand?
You certainly can adapt the worksheet into a spreadsheet for your own use; this guide intentionally presents it as a plain written specification rather than a built-in interactive tool, so it stays usable with nothing more than a tape measure and a pencil.
Method notes
This guide applies the Start Here method guide to shelf spacing specifically: measure your actual items, apply one consistent formula per zone, and treat the shelving system’s adjustment range and load rating as final. It avoids a fixed clearance percentage or weight limit. For one small shelf category, see keeping spice labels visible on a measured shelf or drawer; browse Kitchen Organization for other kitchen zones, or use organizing a small apartment without buying more bins outside the kitchen.
Sources
This article is a measurement and planning method rather than a set of factual claims about a specific product, chemical, or safety requirement, so no external citation is used. Shelf and bracket load limits referenced in this guide are described as system-specific and are intentionally not assigned a number here; readers are directed to their own shelving system’s manufacturer documentation for that figure.