What this guide covers
- Work on one drawer and one task group
- Measure seven points before choosing an insert
- Assign the drawer by task and frequency
- Drawer-layout diagram
- Choose the least complicated divider that solves the problem
- Test the drawer under normal movement
- Keep the counter from becoming the rejected-items drawer
- What not to buy or change yet
- A reset that takes less than two minutes
- FAQ
- Method notes
- Sources
Small kitchen drawer organization starts with the drawer box, not a cutlery-tray listing. Measure the internal width, depth, height, narrowed opening, and the space beneath the counter or drawer above. Then group tools by the cooking task they support and test the drawer with the current contents. A divider is useful only when it fits the full closing path and makes everyday tools easier to remove and return.
Work on one drawer and one task group
Empty a single drawer onto a towel or one clear section of counter. Keep the rest of the kitchen closed. Group the contents into daily cutlery, cooking tools, measuring tools, small preparation tools, wraps or clips, and items that belong elsewhere. Remove obvious packaging and return misplaced items before planning compartments. The aim is not to make every object fit; it is to give the drawer one understandable job.
- Measure the narrowest internal opening after hinges, runners, side walls, and frame lips.
- Measure the tallest tool and test whether handles rise as the drawer moves.
- Protect the drawer’s load and hardware limits by following the cabinet or runner documentation.
- Give the easiest reach to tools used daily, not to a matching insert that happens to fill the space.
- Keep sharp tools and child-access concerns under their specific product and household safety requirements.
Measure seven points before choosing an insert
| Point | How to record it | Why it matters |
|---|---|---|
| Internal width | Left wall to right wall at front, middle, and back | A drawer may taper or lose width around hardware |
| Internal depth | Inside front to inside back, excluding the handle | A tray can stop the drawer from closing even when its width fits |
| Usable height | Base to the lowest frame, counter, or drawer above | Tall dividers and tool handles can catch during movement |
| Opening width | The clear front opening with the drawer fully extended | A rigid insert may fit inside but not pass through the opening |
| Opening depth | How much of the drawer becomes reachable at full extension | The rear compartment may remain hidden or unusable |
| Longest tool | Tip to handle end in its stored orientation | Long tools can bridge compartments and lift as the drawer closes |
| Base condition | Note liners, screws, raised seams, damage, and movement | An uneven base can make an otherwise fitting tray rock or slide |
Write measurements in the unit used by the organizer listing and keep the original values. For reference, 15 inches is 38.1 centimetres and 18 inches is 45.7 centimetres, but a close fit should be compared using the exact manufacturer dimensions rather than a rounded conversion. Leave the working margin needed to lift the insert out for cleaning.
Assign the drawer by task and frequency
Use the same frequency-and-reach logic as small-kitchen cabinet zones, but apply it horizontally. Put the most-used group nearest the hand that opens the drawer. Long cooking tools can occupy one full-length lane. Small tools need a bounded compartment so they do not slide beneath larger handles. Rare tools may belong in the rear only if the drawer extends far enough to reach them without unloading the front.
Do not force unrelated overflow into the final empty gap. Container lids belong with their bases according to the food-container and lid system; spice jars need the environmental and label checks in small-kitchen spice storage. Moving those categories out can solve a drawer problem before a divider is added.
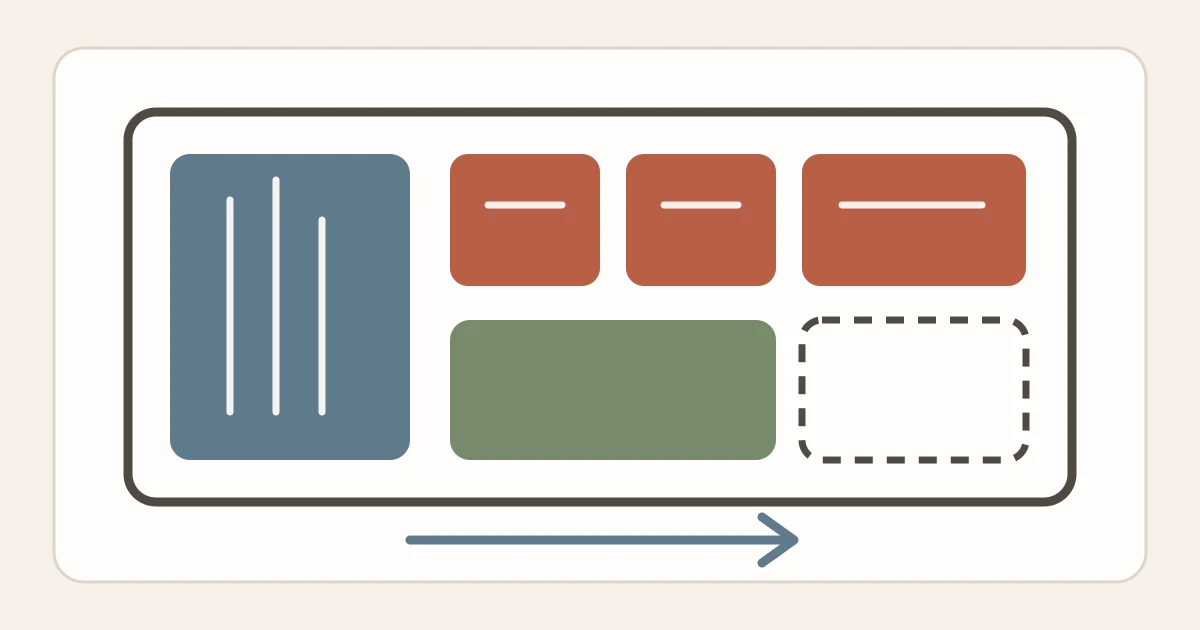
Drawer-layout diagram
The diagram leaves visible boundaries between tasks instead of filling every millimetre. The actual number of compartments should follow the drawer and inventory; the arrow represents the full extension that must remain usable.
Choose the least complicated divider that solves the problem
No insert
A drawer with one category and a small inventory may need no insert. Align long tools in one direction and test the reset for a week. If they stay visible and the drawer closes without catching, open space is not a defect.
A fixed flatware or utensil tray
A rigid tray is quick to remove and clean when its outside dimensions fit the opening. Compare each compartment with the actual longest and widest items. The tray’s overall width is not enough information if teaspoons fit but serving tools do not.
Adjustable dividers
Adjustable dividers create lanes around a mixed collection. Check the stated adjustment range, height, contact method, base compatibility, and installation instructions. Spring pressure, adhesive, cut-to-fit parts, or pegs are different systems; do not assume they are interchangeable or suitable for every drawer finish.
Small modular boxes
Several loose boxes can separate clips or measuring tools, but gaps between boxes may waste space and collect debris. Use existing clean, suitable containers for a dry fit. Open and close the drawer ten times before buying a matching set. If boxes migrate, choose fewer modules or a product designed to stay stable on that surface.
A fitted mat or peg system
A mat or pegboard can help larger tools remain in assigned areas, but every raised component reduces usable height. Confirm the system’s intended drawer type and cutting or assembly directions. Never trim around moving hardware or alter the drawer itself unless the manufacturer permits it.
Test the drawer under normal movement
- Place the proposed organizer empty and confirm it enters through the opening without flexing or forcing.
- Add one representative item to each compartment, including the tallest handle and longest tool.
- Open and close the drawer slowly while watching the top clearance and listening for contact.
- Pull the drawer from the position used during cooking, remove one daily item, and return it with one hand only when that is normally safe for the item.
- Fill only to the planned inventory, repeat the movement, and follow the drawer and organizer load instructions.
Keep the counter from becoming the rejected-items drawer
When a tool does not earn a place in the measured drawer, decide where it supports a real task. Do not leave it on the counter by default. The clear-kitchen-counter reset can help protect the preparation surface while the drawer is tested. Duplicate tools, appliance accessories, and rarely used specialty items may need a different cabinet zone or a decision about whether they still serve the household.
What not to buy or change yet
- Do not order an organizer from the nominal cabinet width; measure the drawer’s internal box and opening.
- Do not stack tools above the usable height and rely on closing force to flatten them.
- Do not add adhesive, spring pressure, screws, or cut parts without following the exact product and surface directions.
- Do not store sharp tools loose where they can shift into the hand path; follow their storage guidance and household access needs.
- Do not fill every compartment merely because an insert provides it.
A reset that takes less than two minutes
After washing and drying tools according to their care instructions, return them directly to the task lane. Once a week, remove anything that migrated from another category and check whether one compartment has become a mixed catch-all. Monthly, lift the removable organizer if its instructions allow, clean the drawer and organizer appropriately, inspect for cracks or movement, and retest the closing path before reloading.
FAQ
Should an organizer fill the entire drawer?
No. A smaller tray plus one open lane may fit long tools better and is easier to remove for cleaning. Useful separation matters more than covering the base edge to edge.
How do I organize a very shallow kitchen drawer?
Measure the clear closing height and keep only low-profile daily tools that fit without rising. A thin tray or no insert may work better than a tall adjustable divider. Move bulky handles to a deeper measured zone.
Are adjustable dividers better than fixed trays?
Neither is universally better. Adjustable dividers suit changing lengths when their mechanism fits the drawer. Fixed trays are simple when their compartment sizes match a stable inventory. Test a paper plan for both.
What belongs in the drawer closest to the stove?
Assign it to the tools used at that workstation only when opening the drawer does not interfere with cooking, another appliance, or a person’s position. The layout and safe access path matter more than a universal proximity rule.
Method notes
The Start Here method becomes a drawer sequence here: define one task, measure the box and movement, reduce misplaced contents, test a paper layout, and add the simplest divider only if needed. It complements small-kitchen cabinet zones without prescribing a universal utensil layout. Browse Kitchen Organization for the surrounding kitchen zones.
Sources
- IKEA, official guide to organized kitchen drawers and drawer-size-specific organizer combinations — ikea.com/us/en/rooms/kitchen/how-to/a-guide-to-organized-kitchen-drawers
- IKEA, official kitchen drawer-dividers category explaining drop-in and adjustable forms — ikea.com/us/en/cat/drawer-dividers-24257
- IKEA, official UPPDATERA adjustable organizer page with product-specific fit, material, and care information — ikea.com/us/en/p/uppdatera-adjustable-organizer-for-drawer-gray-40544194
- IKEA, official UPPDATERA flatware tray page with exact product dimensions and care information — ikea.com/us/en/p/uppdatera-flatware-tray-white-70491410