What this guide covers
Food container sets stay together when you audit what you actually have, retire the pieces that lost their match or their shape, and store lids so they stay visibly grouped with the bases they belong to. This is an inventory problem before it is a storage problem — a dedicated lid organizer can help, but it cannot fix a drawer full of containers with no matching lids in the first place.
Quick plan
- Pull every container and lid out and pair them before sorting further.
- Retire unmatched lids, unmatched bases, and anything visibly damaged.
- Group what remains by shape and size so lids become easy to identify.
- Set a realistic capacity limit based on the drawer or shelf you actually have.
- Re-audit every few months, since sets drift apart faster than most categories.
Measure and check before you buy anything
Constraints table
| Element | Typical space | Access needed | Shelf/surface condition | Added cost | Use frequency |
|---|---|---|---|---|---|
| Container bases (nested) | One drawer or one low cabinet shelf | Daily to weekly | Flat, stable shelf; nesting works best on a level surface | $0 | High |
| Lids, stored on edge | A narrow drawer or a slim vertical gap | Daily to weekly | Needs a divider, book-style holder, or a snug-fitting gap to stay upright | Low, if a divider is genuinely needed | High |
| Rarely used or oversized containers | A higher or deeper shelf | Occasional | None specific | $0 | Low |
The decision process, in order
- Pull everything out and pair each base with its lid. Do this in one pass rather than gradually; partial audits tend to leave orphaned pieces behind in the back of the cabinet.
- Retire anything unmatched or damaged. A base without a lid, a lid without a base, or a container that is visibly cracked, warped, or no longer sealing well has stopped doing its job. Recycle them only where your local program accepts that material, or dispose of them according to local waste guidance, rather than keeping them “just in case a match turns up.”
- Group what remains by shape and size. Round, square, and rectangular containers of a similar size usually share lids or at least stack in a way that makes the correct lid obvious at a glance. This step does more to prevent future mismatches than any organizer.
- Set a capacity limit based on your measured space. Decide how many container sets the drawer or shelf can actually hold without stacking becoming unstable, and treat that number as a real limit, not a suggestion.
- Choose a lid-storage method that keeps lids visible. Storing lids flat in a deep pile is the most common cause of future mismatches, since the lid on the bottom is effectively invisible. Standing lids on edge, even without a dedicated rack, keeps every lid visible at a glance.
- Only then, consider a dedicated lid organizer. If your drawer genuinely cannot hold lids on edge without one, measure the drawer’s interior dimensions before choosing a rack sized to fit it.
Container audit worksheet
This is a fill-in worksheet: work through one shelf or drawer at a time and record what you find. The first row is a completed example; the guidance in each other row’s cells describes exactly what to record, so no field is left unexplained.
| Container group | Bases counted | Matching lids counted | Decision |
|---|---|---|---|
| Example: medium round, 4-cup | 5 | 3 | Keep the 3 matched sets; set the 2 unmatched bases aside for locally accepted recycling or disposal |
| Small round or square containers | Count every base of this size, matched or not | Count only lids that actually seal onto this size | Keep matched sets up to your capacity limit; retire the rest |
| Medium rectangular containers | Count every base of this size, matched or not | Count only lids that actually seal onto this size | Keep matched sets up to your capacity limit; retire the rest |
| Large or bulk containers | Count every base of this size, matched or not | Count only lids that actually seal onto this size | Keep matched sets up to your capacity limit; retire the rest |
| Specialty shapes (odd sizes, single-use brand lids) | Count every base of this type | Count only lids that actually seal onto this shape | Keep only if genuinely used; these are the most common source of future mismatches |
Storage-layout diagram
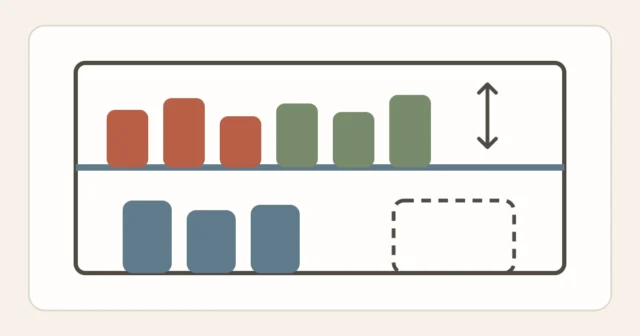
Bases are grouped and nested by size on one side; lids stand upright on the other, so every lid is visible without lifting a stack. A drawer divider or even a stack of books works to keep lids upright if a dedicated rack is not available.
What not to buy or change yet
- Do not buy a lid organizer or new matching container set before the audit and capacity limit are finished — many drawers work well once lids are simply stood on edge.
- Do not keep a base “in case a lid turns up later” beyond one full audit cycle; if the lid has not appeared, the base is not doing its job.
- Do not assume every container needs replacing at once; retire pieces individually as they lose their match or their seal, rather than replacing a whole set preemptively.
- Do not keep containers that no longer seal well for hot or liquid food storage without checking whether they are still suited to that use — see the FAQ below.
A repeatable reset routine
- Weekly, when you put away clean dishes: return each base with its lid rather than nesting bases separately from a lid pile, which is how most sets start to drift apart in the first place.
- Every few months: do a shorter version of the full audit — pull out anything that has drifted apart or that has not been used since the last check.
- Whenever a container is damaged: retire it immediately rather than waiting for the next full audit; a cracked or warped container rarely improves with more use.
FAQ
Should I throw away a container just because the lid does not fit perfectly anymore?
If the lid no longer seals or sits correctly, that is a reasonable reason to retire the set; a container that does not close well is not doing its storage job even if the plastic itself looks fine.
Is it safe to keep using a scratched or cloudy plastic container?
This depends on the specific product and how it is used, so there is no universal answer here — check the manufacturer’s guidance for that container if you are unsure, and treat visible cracking, warping, or a lid that no longer seals as a reason to retire it rather than continue using it, especially for reheating.
Should glass and plastic containers be stored together?
They can be, as long as the storage method accounts for glass being heavier and less stackable at odd angles than plastic; many households find it easier to give glass containers their own lower, sturdier shelf, both for stability and because a dropped glass container is a bigger cleanup than a dropped plastic one.
Is it worth labeling which lid goes with which base?
For sets with very similar sizes, a small mark on the underside of both pieces can save time during the next audit, but for most households the shape-and-size grouping described above is enough on its own, since it naturally narrows a lid down to only a few possible bases.
What is the single biggest cause of mismatched sets?
Storing lids flat in a deep pile, separate from the bases. Once a lid is buried under several others, it is effectively lost until the next full audit, which is why standing lids on edge and visible is the most useful single change in this guide.
Method notes
This guide applies the Start Here method guide to a single kitchen category: audit what you actually have, retire what no longer works, group by shape, and store lids so they stay visible instead of buried. It intentionally avoids making a specific material-safety claim about any container type, since that depends on the individual product; where a claim does need support, it points to USDA and FDA food-safety sources rather than a general assumption. For a capacity-limited, audit-first approach applied to a similar household category, see a small linen closet layout, or browse Kitchen Organization; for the same method applied outside the kitchen, see organizing a small apartment without buying more bins.
Sources
- U.S. Department of Agriculture, Food Safety and Inspection Service, guidance on food-contact packaging materials and container reuse for heating — fsis.usda.gov/food-safety/safe-food-handling-and-preparation/food-safety-basics/meat-and-poultry-packaging
- U.S. Food and Drug Administration, FDA Food Code — fda.gov/food/retail-food-protection/fda-food-code