What this guide covers
- Quick plan
- Measure and check before you buy anything
- Constraints table
- The decision process, in order
- Wall-elevation planning diagram
- Visual-weight and clearance checklist
- Four ways to add height without crowding the room
- What not to buy or change yet
- A repeatable reset routine
- FAQ
- Method notes
- Sources
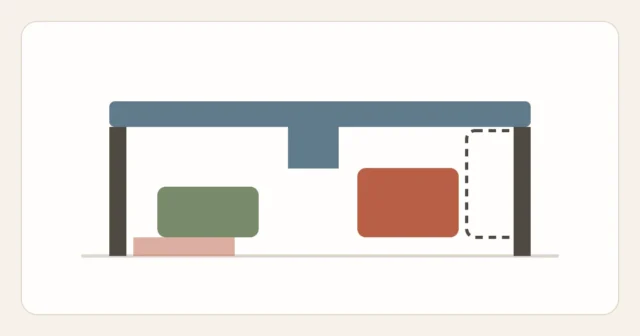
Vertical storage is less likely to feel crowded when it preserves sightlines, leaves visible wall, keeps everyday items within a safe reach, and avoids concentrating bulky objects at eye level. Treat those ideas as a visual test, not a structural rule: sketch the wall in elevation first, then let the actual wall assembly, lease, product instructions, and rated system determine whether anything can be mounted.
Quick plan
- Sketch the wall in elevation before choosing shelf hardware.
- Keep at least one clear sightline to the window or doorway.
- Put heavier visual mass low, lighter and fewer items high.
- Leave real gaps between shelf runs instead of filling the whole wall.
- Confirm wall type and load rating before mounting anything.
Measure and check before you buy anything
Constraints table
| Element | Typical space | Access needed | Surface / lease note | Added cost | Use frequency |
|---|---|---|---|---|---|
| Open shelf within the user’s comfortable reach | A measured bay with visible wall around it | Daily | Lease plus exact shelf/bracket and wall-installation instructions control | Low to moderate | High |
| Tall narrow bookcase | Floor footprint plus full height | Daily to weekly | Should be anchored to the wall regardless of lease | Moderate | Mixed by shelf |
| Over-door rack or hooks | Measure door thickness, top gap, trim, and swing | Daily | Use only when both door and rack instructions permit it | Low | High |
| Higher shelf within safe step-stool access | Measured width and depth; keep clear of ceiling fixtures and vents | Rare | Use only a system approved for the wall and intended load | Low | Low |
The decision process, in order
- Rearrange before you mount anything. Check whether furniture you already own — a bookcase, a cart, a tall cabinet — could be relocated to the wall in question instead of buying new shelving.
- Inventory what actually needs to live at height. Sort items into daily (should stay at arm’s reach), occasional (mid-height is fine), and rare (top zone only). Vertical storage crowds a room fastest when everyday items get pushed to hard-to-reach shelves and low-value decor fills the easy-reach zone instead.
- Reduce the item count before planning shelf count. A wall with fewer, more deliberately placed groups reads as open; a wall with every shelf filled edge-to-edge reads as crowded regardless of the room’s actual size.
- Sketch the wall in elevation. Draw the wall height, mark switches, outlets, vents, and trim, and pencil in shelf heights before drilling anything. This step catches conflicts — a shelf that would block a window’s operable sash, for example — before they become holes in the wall.
- Confirm the installation boundary. Identify the wall assembly only to determine whether the proposed product instructions clearly apply. Do not improvise a fastener or infer a safe load from the shelf alone: the bracket, fasteners, wall material, spacing, condition, and installation method work as one system. If the instructions do not cover the confirmed wall or you cannot rule out concealed utilities, use a qualified installer or choose a freestanding option.
- Install the lowest-risk option first. Try an over-door rack or a single low shelf before committing to multiple wall-mounted runs, so you can confirm the room still feels open before adding more.
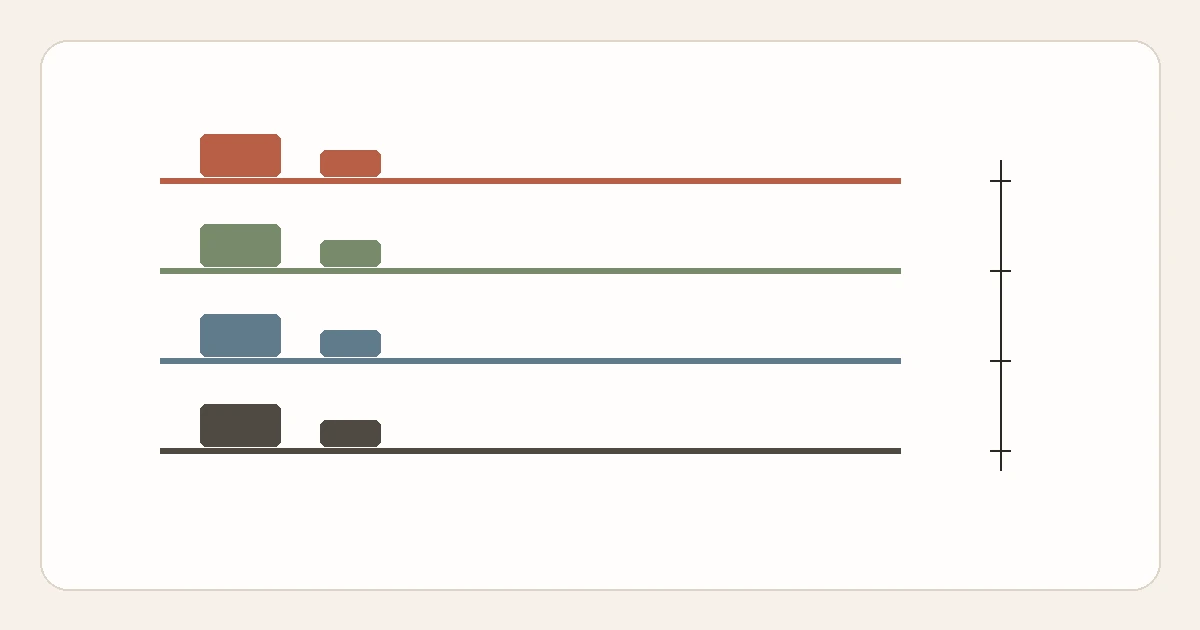
Wall-elevation planning diagram
This template deliberately leaves a broad lower band open, places daily items in the user’s measured reach zone, and limits the higher band to a few rarely used objects. It is a visual worksheet rather than a prescribed shelf height; move each line to match the room, the user, and the product’s installation limits.
Visual-weight and clearance checklist
- At least one full sightline across the room to a window or doorway stays unobstructed.
- No shelf run spans the full wall width without at least one visible gap.
- Darker or bulkier items sit on lower shelves; lighter, smaller items sit higher.
- Switches, outlets, vents, and window trim remain fully accessible.
- Any tall, floor-standing piece used for vertical storage is anchored to the wall.
- The complete installed system and intended contents stay within the exact product instructions and rating.
Four ways to add height without crowding the room
1. A single low open shelf, not a wall of shelving
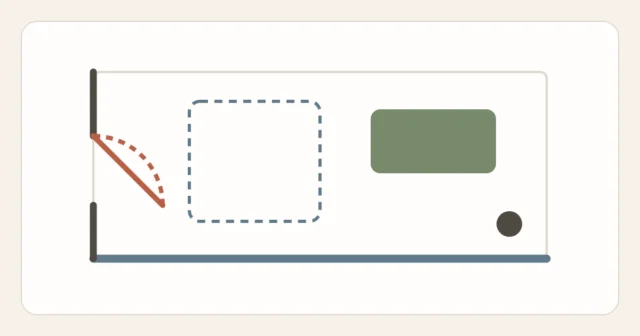
Test one shelf-sized paper template within the actual user’s comfortable reach instead of assuming a universal height. Leave visible wall between the template and adjacent furniture, then view it from the doorway and the main seat in the room. Live with the paper outline for a few days before choosing hardware. This reversible test cannot approve an installation, but it can reveal a sightline or proportion problem before any purchase or wall change.
2. A tall, narrow, anchored bookcase in a dead corner
A narrow unit uses less floor width than a broad one but can also be proportionally tall and tip-prone. Use only a stable product suitable for the location and follow its manufacturer-provided anchoring instructions; the lease does not override that safety requirement. Compare a taped footprint in a corner and on the open wall before deciding, because the better sightline depends on the room’s doors, windows, and furniture rather than a universal corner rule.
3. Over-door storage for daily, lightweight categories
An over-door rack uses no floor footprint, but it can affect closing, latching, trim clearance, hinges, or a peephole and may still mark a surface. Use it only when the door and rack instructions permit that application, the loaded rack stays within its rating, and the door operates normally through its full swing — see entryway storage when you have no closet for the same fit check applied to entry doors.
4. A shallow, high shelf reserved for genuinely rare items
A higher shelf can hold rarely used, lightweight items only when the shelf system is approved for the wall and load and the contents can be retrieved with a stable, appropriate step stool. Do not place luggage or another awkward object overhead merely because space exists. Keep anything requiring inspection, ventilation, label access, or frequent rotation in an easier zone. where to store luggage in a small apartment and a small linen closet layout show safer ways to rank low-frequency categories by size and access.
What not to buy or change yet
- Do not buy floor-to-ceiling shelving units before testing whether a single shelf changes how the room feels.
- Do not drill into an unknown wall, a shared wall you suspect carries plumbing or wiring, or a ceiling, to gain vertical storage.
- Do not stack storage on top of an existing tall, unanchored piece of furniture — anchor it first, or choose a different zone.
- Do not buy decorative baskets or bins to fill empty shelf space just because the shelf is there; empty space at height is part of what keeps a small room feeling open.
A repeatable reset routine
- Monthly: check that the lower third of the wall is still mostly clear and that no shelf has crept toward full-edge-to-edge.
- Seasonally: rotate what sits on the high, rare-use shelf so it still matches what you actually need there.
- Whenever you add a new wall-mounted piece: re-check the whole wall in elevation rather than adding it in isolation, since a room can cross from open to crowded with a single addition.
FAQ
How do I know if a wall will look crowded before I install anything?
Tape paper templates at the planned shelf heights and widths, then live with them for a few days. This catches sightline and visual-weight problems that a quick sketch can miss.
Is it better to use one long shelf or several shorter ones?
Several shorter runs with visible gaps between them generally read as more open than one continuous shelf, even at the same total storage capacity.
What should I test first when the wall already feels busy?
Test the eye-level band with paper outlines and remove one proposed shelf run from the sketch. Because that band is prominent from many viewpoints, a smaller, deliberate group may feel calmer than using it for overflow. This is a visual preference test, not a claim that one shelf position works for every room.
Do I need to anchor a short bookcase, not just a tall one?
Do not decide from height alone. Follow the specific furniture manufacturer’s stability and anchoring instructions, especially for any unit a child could climb or pull on. If the instructions are missing, the furniture is damaged, or the required anchoring method is incompatible with the wall or lease, do not improvise; contact the manufacturer or use appropriate qualified help.
Method notes
This guide follows the Start Here method guide, applied to a wall instead of a room: measure first, sort by frequency, reduce before adding hardware, and reassess the whole elevation whenever something changes. It intentionally does not recommend a specific shelving brand or bracket system, since wall type, ceiling height, and load rating vary by home. For the same measurement-led approach applied to other zones, browse Small-Space Storage, or start from organizing a small apartment without buying more bins if you have not yet sorted what belongs at height in the first place.
Sources
- U.S. Consumer Product Safety Commission, Anchor It! furniture and TV tip-over prevention program — cpsc.gov/Safety-Education/Safety-Education-Centers/AnchorItgov
- U.S. Consumer Product Safety Commission, Home Safety Checklist guidance for reaching high shelves — cpsc.gov/s3fs-public/701.pdf
- Command™ Brand (3M), model-specific hook application instructions — command.com/3M/en_US/command/how-to-use/all-other-hooks
- Command™ Brand (3M), product-specific weight-limit guide — command.com/3M/en_US/command/how-to-use/product-weight-limits