What this guide covers
- Quick plan
- Check before buying or changing anything
- Constraints table
- The decision process, in order
- Desk-clearance and cable-route plan
- Work-zone decision worksheet
- An end-of-day reset, if the desk shares another room
- What not to buy or change yet
- A repeatable review method
- FAQ
- Method notes
- Sources
A small rental home office works when you choose a work zone based on the floor and wall space you actually have, measure the desk surface and chair clearance before buying anything, and plan the cable route and end-of-day reset alongside the layout — all without a single permanent change. There is no one universally optimal layout; the right one depends on your room, your equipment, and how the desk shares the rest of the space.
Quick plan
- Choose a work zone based on measured floor and wall space, not a guess.
- Confirm chair clearance and walking-path width before finalizing placement.
- Plan the cable route alongside the layout, not as an afterthought.
- Set an end-of-day reset if the desk shares another room.
- Use general workstation guidance as a starting point, not a mandatory rule.
Check before buying or changing anything
Constraints table
| Factor | What to check | Who or what decides | Reversibility |
|---|---|---|---|
| Work zone location | Available floor and wall space, and whether the zone shares another room’s function | Your own measurements | Fully reversible if no hardware is attached |
| Desk/work-surface size | Actual surface dimensions against your equipment’s footprint | Your measurements and the furniture’s own dimensions | Easy to adjust before purchase |
| Chair clearance | Room to push back and stand, and to pass by if the zone is in a shared space | Your own measurements | Easy to adjust |
| Cable route | Path from each device to the nearest outlet | Your own mapped route | Fully reversible if no hardware is attached |
| Lighting | Use of existing safe outlets and fixtures, without adding new wiring | Your existing fixtures and any lamp’s own instructions | Fully reversible |
The decision process, in order
- Measure candidate work zones before choosing one. Compare available wall and floor space across a few spots rather than defaulting to the first open corner, the same reassign-before-you-buy approach described in organizing a small apartment without buying more bins.
- Match the desk surface to your equipment, not the reverse. Measure your monitor, laptop, and any accessories, and choose a surface sized to fit them with some working room left over.
- Confirm chair clearance and circulation. Make sure the chair can push back fully and that anyone needs to pass by the zone still can, especially if the desk sits in a shared room. Test this by actually sitting down and pushing back, rather than estimating from a photo or a general rule of thumb.
- Plan the cable route alongside the layout. Map each device’s path to the nearest outlet before finalizing the desk’s position, keeping the route along a furniture edge or wall rather than across open floor, and clear of any doorway or walkway.
- Use existing lighting and outlets rather than adding wiring. A lamp plugged into an existing safe outlet is a reversible choice; running new wiring or altering a fixture is not something this guide covers or recommends.
- Only then, consider storage or organizing add-ons. A drawer unit, a wall shelf, or a cable organizer should be sized to a layout you have already tested, not guessed at in advance; check your lease and the exact product’s own surface and load instructions before mounting anything to a wall.
Desk-clearance and cable-route plan
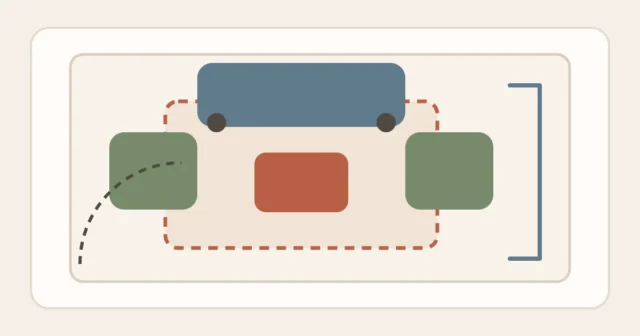
The clearance zone behind the chair is planned space, chosen by the reader, not a manufacturer-specified safety minimum; adjust it to your own chair and how the room is used.
Work-zone decision worksheet
This is a fill-in worksheet. Complete one row per candidate zone before choosing.
| Candidate zone | Desk surface fits? | Chair clearance available? | Cable route to an outlet? |
|---|---|---|---|
| Example: corner of the living area | Yes, a 40 in / 102 cm surface fits with room to spare | Yes, chair clears without blocking the main walkway | Yes, along the wall to a nearby outlet |
| Record your candidate zone | Measure your actual desk and equipment against the space | Measure chair push-back and passing room | Trace the actual route, not an estimate |
| Record your candidate zone | Measure your actual desk and equipment against the space | Measure chair push-back and passing room | Trace the actual route, not an estimate |
An end-of-day reset, if the desk shares another room
When a work zone doubles as part of a living or sleeping space, a short reset at the end of the day keeps it from permanently taking over the room. Close the laptop or cover the monitor, return loose papers or accessories to one assigned spot, and push the chair in — the same short, bounded-reset logic used in a clear-kitchen-counter reset works well applied to a shared work corner. A consistent few-minute reset also makes the zone feel usable as a living space again in the evening, rather than a workstation that never fully clears.
What not to buy or change yet
- Do not buy a desk before measuring both the candidate zone and your actual equipment against it.
- Do not run new wiring, add outlets, or alter a light fixture as part of setting up a work zone.
- Do not overload an outlet or power strip; follow each device, charger, and power strip’s own manufacturer instructions for what it can handle.
- Do not treat a single layout as the universally correct one — what works for one room, one chair, and one set of equipment will not necessarily work for another.
A repeatable review method
- After the first week of use: check whether the chair clearance, desk height, and monitor placement still feel workable, and adjust before committing further.
- Whenever equipment changes: re-measure rather than assuming a new monitor or accessory will fit the existing layout.
- Periodically: confirm the cable route and any wall-mounted additions are still secure and still clear of walkways and doors.
FAQ
What desk height or chair setup is correct?
There is no single mandatory dimension. OSHA’s general workstation guidance offers reference points such as supported feet, relaxed shoulders, elbows kept close to the body, and a monitor position that does not require an awkward head or neck position; use those as prompts to evaluate your own equipment rather than as medical treatment or a fixed measurement standard. If the setup is not comfortable or workable for you, adjust the layout rather than forcing yourself to match a generic diagram.
Can I mount a monitor arm or shelf above the desk?
Only after checking your lease and the exact product’s own surface and load instructions — the same wall-mounting caution described in using vertical storage without crowding a room applies here. A monitor arm in particular should be matched to your specific monitor’s weight per its own manufacturer instructions, since an undersized clamp or mount can fail under a heavier display than it was rated for.
What if my only available zone is very small?
A compact freestanding desk or table can work if it still leaves genuine chair clearance and does not block a walkway. Prioritize a route that keeps normal circulation usable and lets the equipment reach an appropriate outlet without permanent wiring changes; do not introduce a wall-mounted fold-down surface unless the lease, wall condition, and exact product instructions have all been checked separately.
Is a standing desk converter a good option for a small rental?
It can be, depending on your existing surface’s stability and the converter’s own weight and footprint requirements — check the specific product’s instructions rather than assuming it fits any desk. A converter also changes the clearance needed behind the setup, so re-measure that zone once it is in place rather than assuming your seated-desk measurements still apply.
Method notes
This guide applies the Start Here method guide to a shared or improvised home office: measure the zone and the equipment, plan clearance and cable routing together, and reset the space if it doubles as another room. It deliberately avoids presenting one layout as universally optimal and does not provide medical or treatment guidance, citing OSHA’s general workstation principles only as reference information. For the same reduce-and-measure approach applied to furniture and storage, see organizing a small apartment without buying more bins, or browse Rental-Friendly Living for more of this reversible-first approach to a rental.
Sources
- Occupational Safety and Health Administration, Computer Workstations eTool — osha.gov/etools/computer-workstations
- Occupational Safety and Health Administration, interpretation on listed relocatable power taps/power strips and manufacturer/listing instructions — osha.gov/laws-regs/standardinterpretations/2002-11-18