What this guide covers
A kitchen cabinet works best when its zones follow how you actually cook, not a diagram from a magazine. Assign each shelf by how often an item is used, how heavy or awkward it is to lift, and how far you can comfortably reach — using the cabinets you already have. There is no universal “ideal” shelf height; your cabinet’s own dimensions and your own reach set the plan.
Quick plan
- Empty one cabinet at a time and group items by the task they belong to.
- Rate each group by frequency, weight, and how awkward it is to lift.
- Put daily, light items at your easiest reach; rare or heavy items elsewhere.
- Keep items near the task they support, not just near where they fit.
- Revisit zones every few months, since kitchens drift faster than closets.
Measure and check before you buy anything
Constraints table
| Zone | Typical position | Access needed | Door/drawer swing | Added cost | Use frequency |
|---|---|---|---|---|---|
| Easy-reach shelf (waist to shoulder) | Lower-middle to middle of upper cabinets, or the top drawer bank | Daily, no stool | Confirm the door does not hit an appliance or adjacent cabinet when fully open | $0 | High |
| Stretch-reach shelf | Top of upper cabinets or bottom of a deep lower cabinet | Occasional, may need a stool for the top shelf | Usually unrestricted once the door is open | $0 | Low to medium |
| Floor-level cabinet or deep corner | Base cabinets, often the hardest to see into | Requires bending or kneeling | Confirm nothing blocks the door from opening fully | $0 | Low to medium |
| Drawer zone | Any drawer bank near the main workspace | Daily to weekly | Confirm full drawer extension is not blocked by a handle, appliance, or island | $0 | High for utensils, lower for linens |
The decision process, in order
- Empty one cabinet completely and sort by task. Group items by what they are used for — everyday cooking, baking, serving, storage — rather than by category alone. A mixing bowl used weekly and a rarely used stockpot are not the same zone, even if both are “pots.”
- Rate frequency, weight, and awkwardness for each group. A heavy stand mixer used weekly is a different placement problem than a light, rarely used vase, even though both might currently share a shelf. Note which items are hard to lift with one hand or have an odd shape that makes a stretch-reach genuinely unsafe.
- Assign the easiest-reach zone to daily, light items first. This is almost always the most contested shelf in the kitchen, so protect it for what you actually use every day rather than whatever ended up there historically.
- Place heavy or awkward items by safe access, not by a universal rule. A heavy stand mixer or a stack of cast iron generally belongs at a height and shelf depth you can lift from without an awkward twist — for most cabinets that means low and shallow rather than high or deep, but confirm this against your own cabinet’s dimensions and your own capability rather than assuming a fixed height applies to every kitchen.
- Group by task relationship, not just by object type. Baking items work better together near the mixing area than split across “bowls here, pans there” if baking is a single recurring task in your kitchen.
- Only then, consider an insert or riser. If a specific shelf still does not work well after this pass — usually a deep corner or a very tall gap — measure that shelf’s exact dimensions before considering an insert sized to it.
Frequency, weight and reach placement map
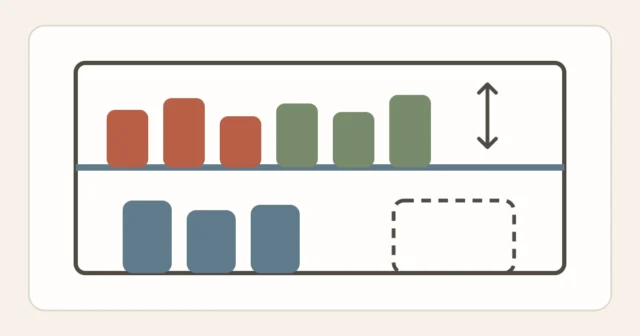
A useful pattern is to protect the easiest-reach shelves for daily items and move only lightweight, stable, rarely used items higher when they can still be retrieved comfortably. Heavy, fragile, or awkward items need a shelf that allows a controlled lift; that may be low in many kitchens, but the exact position depends on your reach, the item’s shape, and the cabinet itself.
Frequency / weight / reach matrix
| Item group | Frequency | Weight / awkwardness | Recommended zone |
|---|---|---|---|
| Everyday plates, bowls, mugs | Daily | Light, easy to stack | Easy-reach shelf, closest to the dish-drying area |
| Stand mixer, heavy stockpot, cast iron | Weekly or less | Heavy, often awkward to lift with one hand | Low shelf or floor-level cabinet, close to counter height |
| Everyday cooking utensils | Daily | Light | Drawer nearest the stove or main prep area |
| Special-occasion serveware | A few times a year | Varies; may be fragile, heavy, or awkward | Use an easy-to-reach shelf if fragile, heavy, or awkward; reserve higher shelves only for lightweight, stable items you can retrieve comfortably |
| Small appliances used occasionally | Weekly to monthly | Moderate weight, often bulky | A shelf that allows a controlled two-handed lift; choose the exact height from your reach and the appliance’s size and weight |
A worked zoning example
A one-wall kitchen with a single run of upper and lower cabinets might end up looking like this after a full sort: the upper cabinet directly above the coffee station holds daily mugs and everyday glassware at the easy-reach shelf, with its top shelf reserved for lightweight, rarely used serving accessories that can be retrieved comfortably. The lower cabinet beside the stove holds daily pots and pans at the easy-reach shelf, with the heavy stockpot and cast iron skillet on a low, easily reached shelf in that same cabinet, since both are awkward enough that bringing them down from a high shelf would add unnecessary reach. A narrow drawer under the counter holds daily utensils, positioned an arm’s reach from the stove rather than across the kitchen. A galley kitchen with cabinets on two walls might split the same logic across both runs instead — daily items on whichever wall sits closer to the main workspace, rare items on the far wall regardless of which cabinet has more physical space. Your own layout will differ — the point is that each zone was assigned by task and by lift safety, not by which cabinet happened to be empty first.
What not to buy or change yet
- Do not buy shelf risers, lazy Susans, or drawer inserts before the frequency/weight/reach sort is finished — many cabinets work well with no insert at all once the sort is done.
- Do not assume every kitchen needs the same “pots low, plates high” layout; base the plan on your own cabinet depths and your own cooking habits.
- Do not remove, reposition, or re-drill cabinet shelf pins or hardware as a first step; try the reassignment first, since it costs nothing and is fully reversible.
- Do not store anything heavy on a shelf that is visibly warped, loose, or pulling away from its pins — treat that as a sign to redistribute weight, not to add more.
A reset routine for zones that drift
- Monthly: check whether anything has migrated onto the easy-reach shelf that does not belong there, and return it to its assigned zone.
- Seasonally: re-check whether a “daily” item has actually become occasional, or the reverse — cooking habits shift with the seasons more than most people expect.
- After a kitchen gadget purchase or gift: assign it a zone using the same frequency/weight/reach questions before it defaults to whatever shelf has open space.
FAQ
Should heavy items always go on the bottom shelf?
There is no single best height. A lower shelf may reduce overhead reach, but a very deep or floor-level cabinet can still be awkward to access. Match the exact shelf to your own reach, the item’s shape and weight, and the cabinet’s usable depth rather than following a blanket rule.
What if two people share the kitchen and have different reach heights?
Assign the easiest-reach zone using the shorter household member’s comfortable reach, and let the taller member use the stretch-reach zone for their own daily items if needed. A shared kitchen usually works better with an explicit split like this than with one universal height.
Do I need special corner cabinet hardware?
Not necessarily. Many corner cabinets work fine with the low-frequency, less-awkward items assigned to the hardest-to-reach back corner, reserving the accessible front zone for whatever you actually use often — try this before assuming hardware is required. If the corner is genuinely unusable even for rare items, that is useful information too; some corner cabinets are better used for bulky, lightweight items like mixing bowls than for anything you need in a hurry.
Does this method work if I rent and cannot change the cabinets themselves?
Yes — the entire method is a reassignment of what goes where, not a change to the cabinet itself, so it works the same whether you own or rent. Nothing in this guide requires drilling, adding hardware, or otherwise modifying a rented kitchen.
How often should I redo the whole sort?
A full re-sort once or twice a year is usually enough; the monthly and seasonal checks in the reset routine above should catch most drift in between.
Method notes
This guide applies the Start Here method guide to kitchen cabinets specifically: measure the actual shelf space and your own reach, sort by frequency and weight, assign zones by task, and reassess when items drift. It intentionally avoids a universal shelf height or fixed capacity. For two narrower follow-ups, use the dedicated spice-storage measurement guide and the complete kitchen-drawer fit check; for the same reach logic on walls, see using vertical storage without crowding a room. Browse Kitchen Organization or use organizing a small apartment without buying more bins for the broader reduce-before-buying method.
Sources
This article describes a general organizing method and does not make a specific safety, load-limit, or manufacturer claim that requires an external citation. Where a shelf or bracket’s load limit matters, this guide points readers to that product’s own manufacturer documentation rather than citing a source here.