What this guide covers
- Quick plan
- Measure and check before you buy anything
- Decision table for location constraints
- The decision process, in order
- Small-room drying-layout diagram
- Spacing and airflow checklist
- The "move, rotate, remove" routine
- What not to buy or change yet
- A repeatable maintenance method
- FAQ
- Method notes
- Sources
A practical indoor-drying routine gives wet items real separation, uses a location reached by the home’s existing airflow, and removes items once they are dry instead of leaving damp laundry piled or hanging indefinitely. This guide cannot promise a mold-free or odor-free result — that depends on your specific home’s ventilation and moisture levels — but spacing, placement, and a repeatable move/rotate/remove routine are factors you can control.
Quick plan
- Give each garment real air space instead of crowding a rack.
- Choose a spot your home’s existing airflow reaches, not a sealed corner.
- Never let a drying spot block a door, vent, heater, or exit path.
- Rotate or reposition items partway through if one side stays damp.
- Remove items promptly once dry rather than leaving them staged.
Measure and check before you buy anything
Decision table for location constraints
| Location | Airflow | Egress/door impact | Heat-source proximity | Added cost | Best for |
|---|---|---|---|---|---|
| Near a window that opens | Good, when the window is open | None, if the rack does not block the window’s operation | Usually low risk | $0 | Most garment types, weather permitting |
| Bathroom with a working exhaust fan | Depends on the room and fan; use the fan as intended and do not obstruct it | Confirm the door and any exit path stay clear | Keep textiles clear of heat sources and fixtures | $0 | Smaller loads when the room allows real spacing |
| Open living space with general airflow | Moderate — depends on your home’s normal circulation | Must not block a walking path or door swing | Keep well clear of any heater, radiator, or fireplace | $0 | Larger loads, when space allows real spacing |
| Sealed-off corner or closet with no airflow | Poor — avoid for drying | N/A | N/A | N/A | Not recommended for indoor drying |
The decision process, in order
- Choose a location your home’s existing airflow actually reaches. A room with normal air movement, a spot near (not blocking) an exhaust fan, or an open window when outdoor conditions make that practical can be preferable to a still, sealed corner. Do not disable, cover, or otherwise defeat a building’s ventilation system to create a drying spot.
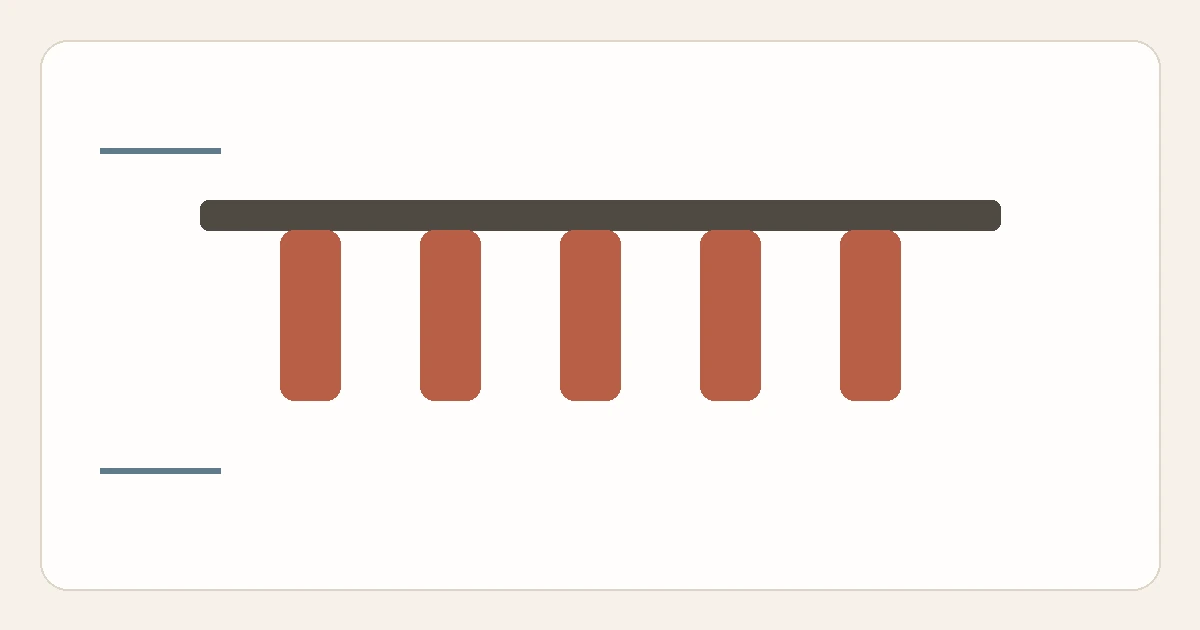
- Space garments with real gaps, not just what fits on the rack. As a practical target, leave enough room that no two garments touch — this alone does more for drying speed and freshness than most other changes.
- Keep the spot clear of doors, vents, heaters, and exit paths. A drying rack should never block a doorway, a window’s operation, an air vent, or — most importantly — an exit path.
- Check and rotate partway through. Thicker items or anything folded over a rung often dries unevenly; flip or reposition these once you notice one side is still damp.
- Remove each item as soon as it is dry. This is the single biggest lever against a “musty routine” — a rack that empties promptly does not have time to develop odor, while one that lingers with a few stubborn items for days often does.
- Only then, consider a fan, dehumidifier, or more rack space. If your specific room genuinely lacks airflow even after trying a better-ventilated spot, a fan pointed across the drying area or a dehumidifier can help — but this guide does not recommend a specific product or brand; choose based on your room’s size and your own testing.
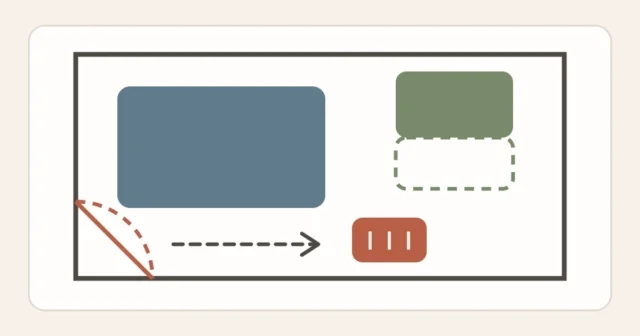
Small-room drying-layout diagram
The rack sits near the window’s airflow, garments are spaced with visible gaps, the walking path stays clear, and the setup is positioned well away from the heater in the corner.
Spacing and airflow checklist
- No two garments are touching or overlapping on the rack.
- A window, door, or working vent provides genuine airflow to the spot.
- The rack does not block a doorway, window operation, or exit path.
- Nothing is draped on or touching a heater, radiator, or other heat source.
- No air vent, thermostat, or smoke alarm is obstructed by hanging items.
- Each item’s care label allows the drying method you are using.
The “move, rotate, remove” routine
- Move: if the original spot turns out to have poor airflow after a load or two, relocate the rack rather than continuing to use a spot that leaves items damp longer than expected. The same wall- and floor-space thinking used in using vertical storage without crowding a room applies to finding a better-ventilated spot without crowding the room.
- Rotate: partway through drying, flip thicker items or reposition anything folded over a rung so both sides get airflow.
- Remove: take each item down as soon as it is dry rather than waiting for the whole rack to finish — this keeps the rack turning over instead of holding a few stragglers for days.
What not to buy or change yet
- Do not buy a larger rack before confirming your current one is being used with real spacing between garments — overcrowding, not rack size, is the more common cause of slow, uneven drying.
- Do not buy a dehumidifier or fan before trying a better-ventilated location first; a location change is free and often solves the problem on its own.
- Do not disable, block, or redirect a building’s ventilation system, exhaust fan, or trickle vent to speed up drying.
- Do not drape anything over or against a heater, radiator, or other heat source unless that specific equipment’s manufacturer instructions explicitly allow it.
A repeatable maintenance method
- Each load: check the rack once partway through for uneven drying and rotate anything that needs it.
- Each load: remove items as they finish rather than waiting for the last one, so the rack does not sit loaded longer than necessary.
- Periodically: reassess whether your chosen spot is still the best-ventilated option available, especially if your household’s routine or the season changes how doors and windows are typically used.
FAQ
Is indoor drying always going to cause a musty smell?
Not necessarily — spacing, airflow, and prompt removal are the main levers, and many households dry indoors regularly without a persistent odor. This guide cannot promise a specific outcome for your home, since ventilation and humidity vary by home and by season, and by how many loads are drying at once.
Can I use a fan to speed things up?
Yes, positioned to move air across the rack rather than directly at one spot; this guide does not recommend a specific fan model or brand, and a fan does not replace real spacing between garments. A fan aimed at a crowded, overlapping rack will still leave the touching sections slow to dry.
What if my only realistic drying spot is near a heater?
Choose a different spot if at all possible; if none exists, keep a clear, safe distance from the heat source and never drape anything directly on or against it. See organizing a small apartment without buying more bins for how to find and reassign under-used zones elsewhere in a small home that might work better — a spot you had not previously considered for laundry, such as an underused wall segment or the far side of a room, is often more available than it first appears once you look at the whole apartment rather than just the room the laundry happens to land in.
How long will it take for clothes to dry indoors?
This varies too much by fabric, humidity, and airflow for a universal number to be useful; the “move, rotate, remove” routine above is designed to work regardless of how long a specific load actually takes.
Method notes
This guide applies the Start Here method guide to indoor drying specifically: measure spacing, choose a location by airflow rather than convenience, and build a routine around removing items promptly. It deliberately avoids promising a mold-free result, diagnosing moisture conditions, or inventing a drying time, since all of these depend on your specific home. Plan the equipment’s full open-to-folded cycle with folding drying-rack storage; for nearby routines, browse Laundry & Cleaning or apply the same reduce-and-reassign logic to entryway storage when you have no closet.
Sources
- U.S. Environmental Protection Agency, mold and moisture control guidance (indoor relative humidity reference) — epa.gov/mold/mold-course-chapter-2
- U.S. Consumer Product Safety Commission, portable-heater safety guidance for keeping clothes and other combustible items at least three feet away — cpsc.gov/Newsroom/News-Releases/2026/Winter-Storm-May-Knock-Out-Power-CPSC-Warns-of-Deadly-Carbon-Monoxide-and-Fire-Risks